牧夫天文网

 找回密码
 加入牧夫(请注明天文爱好者,否则无法通过审核)

QQ登录

只需一步,快速开始

拆HEQ5

[复制链接]
steveyzh 发表于 2011-4-7 22:08 | 显示全部楼层 |阅读模式 来自: 福建省泉州市 电信

马上注册,结交更多好友,享用更多功能,让你轻松玩转社区。

您需要 登录 才可以下载或查看,没有账号?加入牧夫(请注明天文爱好者,否则无法通过审核)

x
本帖最后由 steveyzh 于 2011-4-7 22:09 编辑

http://www.astronomyforum.net/telescope-mounts-forum/92624-eq5-heq5-eq6-pro-telescope-mount-modifications-hyper-tuning.html

[

                               
登录/注册后可看大图

                               
登录/注册后可看大图

                               
登录/注册后可看大图
Remove the silver Phillips screw in the declination
lock lever.
Remove the lock lever. You may need to prise this
up by using the tip of a flat bladed screwdriver and

gently twisting the tip.
Remove the brass declination lock bolt. You may
need to use a small spanner or pliers to loosen it.

评分

参与人数 1牧夫币 +6 收起 理由
errai + 6 谢谢分享

查看全部评分

 楼主| steveyzh 发表于 2011-4-7 22:09 | 显示全部楼层 来自: 福建省泉州市 电信

                               
登录/注册后可看大图

                               
登录/注册后可看大图

                               
登录/注册后可看大图
Remove the small 'button' if this didn't come out
with the lock bolt. If you cant get this out don't
worry it can be removed at a later stage.
Unscrew the 6 Phillips screws around the plastic
motor cover.
Remove the motor cover and lay it aside with its
screws.
回复 支持 反对

使用道具 举报

 楼主| steveyzh 发表于 2011-4-7 22:10 | 显示全部楼层 来自: 福建省泉州市 电信

                               
登录/注册后可看大图

                               
登录/注册后可看大图

                               
登录/注册后可看大图
Loosen the 3 set screws in the dovetail carrier.
These are located closest to the dovetail.
Remove the dovetail carrier. You may have to twist
it back and forth and gently rock it off.
Note: You can at this point remove the
counterweight bar by pushing it up and out of the
DEC axis after removing the knurled safety nut on

the end.
Loosen the deep set screws in the Declination
barrel. On my mount these screws do not hold
anything as the barrel is a single piece of machined
metal. But some mounts are two piece.
回复 支持 反对

使用道具 举报

 楼主| steveyzh 发表于 2011-4-7 22:11 | 显示全部楼层 来自: 福建省泉州市 电信

                               
登录/注册后可看大图

                               
登录/注册后可看大图

                               
登录/注册后可看大图
Unscrew and Remove the round 'nut' at the top of
the Declinationshaft. You can use either a pair of
Allen keys, two small Phillips drivers or a pair of
strong snipe nosed pliers as shown here. At this
stage you may be able to remove the Declination
barrel if its in two pieces (mine appears to be a
single piece) . If not don't worry and carry on - it will
be freed up later.
Loosen the three set screws in the counterweight
collar.
Unscrew the counterweight collar. It may be quite
tight.
回复 支持 反对

使用道具 举报

 楼主| steveyzh 发表于 2011-4-7 22:11 | 显示全部楼层 来自: 福建省泉州市 电信

                               
登录/注册后可看大图

                               
登录/注册后可看大图

                               
登录/注册后可看大图
Remove the tapered bearing behind the counter-
weight collar. Mine showed very little lubrication as
can be seen here.
Remove the Declination scale from the counter-
weight collar. If the mount is to be GoTo apply a
small smear of grease otherwise clear any grease
from the collar.
Loosen the worm adjustment set screw located just
in front of the power panel. This will need to be
loosened a lot.
回复 支持 反对

使用道具 举报

 楼主| steveyzh 发表于 2011-4-7 22:12 | 显示全部楼层 来自: 福建省泉州市 电信

                               
登录/注册后可看大图

                               
登录/注册后可看大图

                               
登录/注册后可看大图
Loosen the opposing worm adjustment set screw
opposite the screw on the previous step - as shown
above. This will also need to be slackened off a lot.
Remove the three cap head bolts. They are usually
silver coloured located on the top of the worm
carrier.
Now lightly tap the end of the Declination shaft
which is exposed (after removing the counterweight
collar) with a rubber mallet or block of wood.
回复 支持 反对

使用道具 举报

 楼主| steveyzh 发表于 2011-4-7 22:12 | 显示全部楼层 来自: 福建省泉州市 电信

                               
登录/注册后可看大图

                               
登录/注册后可看大图

                               
登录/注册后可看大图
Slide out the Declination shaft and set it aside.
On my unit the Declination barrel refused to budge
from the main shaft - this isn't important.
Note: If you had been unable to get the lock lever
'brass button' earlier - it will now be easy to remove
from inside the Dec barrel.
Remove the brass Declination gear carefully.Take care to note and remove the small clear
washer andremember to replace
回复 支持 反对

使用道具 举报

 楼主| steveyzh 发表于 2011-4-7 22:13 | 显示全部楼层 来自: 福建省泉州市 电信

                               
登录/注册后可看大图

                               
登录/注册后可看大图

                               
登录/注册后可看大图
Remove the worm drive carrier.Remove the roller bearing from the main housing.
My bearings showed poor lubrication from the
factory.
Remove the two roller bearings from the Declination
gear. The gear showed swarf contamination from the
manufacturing process in my mount.
回复 支持 反对

使用道具 举报

 楼主| steveyzh 发表于 2011-4-7 22:14 | 显示全部楼层 来自: 福建省泉州市 电信

                               
登录/注册后可看大图

                               
登录/注册后可看大图

                               
登录/注册后可看大图
Remove the brass drive gear from the end of the
worm. This has two set screws and may need to be
pulled off using some blunt nosed pliers on its
central raised area NOT on the teeth.

Do not lever this off as it can be easily damaged.
The worm is held into the carrier by two 'float'
adjusters. These require a special tool BUT can
be removed by using a pair of small screwdrivers.
Inser the drivers into the small slot and rotate
using even pressure. Remove only ONE of the
float adjusters.
Remove the worm itself. You will notice it has two
small bearings, these can be removed. One of the
bearings is shown in the picture in the bottom
right hand corner.
Note the worm adjustment set screws. You will
need to adjust these at the end of re-assembly.
回复 支持 反对

使用道具 举报

 楼主| steveyzh 发表于 2011-4-7 22:14 | 显示全部楼层 来自: 福建省泉州市 电信
本帖最后由 steveyzh 于 2011-4-7 22:17 编辑


Stage 3 - Cleaning & Lubrication


登录/注册后可看大图

With a clean lint free cloth now wipe all the oil from
the components. On my mount the roller bearings
were sealed and appeared to be well lubricated so

were left alone. The tapered bearing had almost no
lubrication and so was cleaned and relubricated with

lithium grease.

To lubricate bearings put a blob of grease onto the palm

of your hand and press the bearing into it and
then rotate the bearing around forcing the grease into the

inside of the bearing.

The brass worm gears and steel worm should all be cleaned

in a degreasing agent. I personally find
really hot water and a basic detergent works best. These were

cleaned with a soft toothbrush and then rinsed and left to dry.
All of the gears showed either little lubrication and/or engineering
swarf though none of the legendary black 'goop' that is supposed
to be used in Synta mounts.

The picture to the left shows all of the gears and bearings cleaned

and awaiting lubrication and re-assembly.
回复 支持 反对

使用道具 举报

wenzp 发表于 2011-4-7 22:16 | 显示全部楼层 来自: 江苏省苏州市 电信
这个要收藏,谢楼主。。。
回复 支持 反对

使用道具 举报

 楼主| steveyzh 发表于 2011-4-7 22:17 | 显示全部楼层 来自: 福建省泉州市 电信
Stage 4 - Re-assembling the Worm Carrier

                               
登录/注册后可看大图

                               
登录/注册后可看大图

                               
登录/注册后可看大图
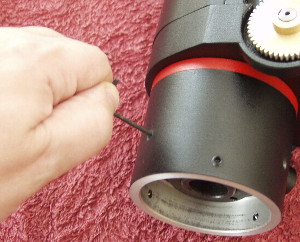
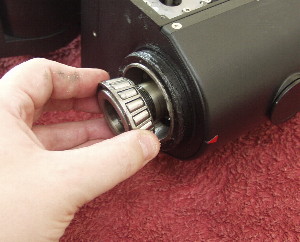
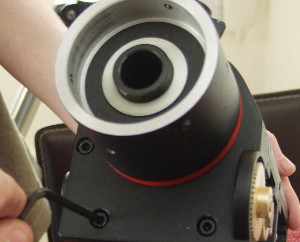
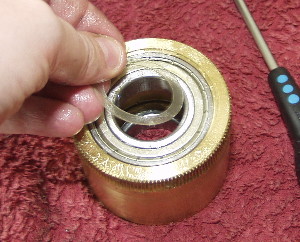
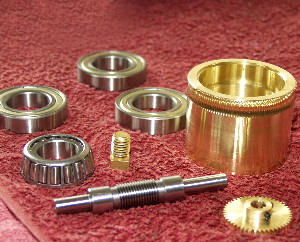
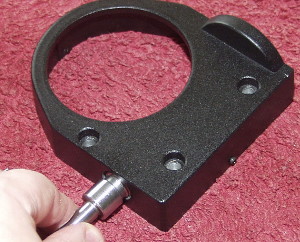
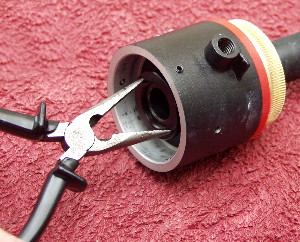
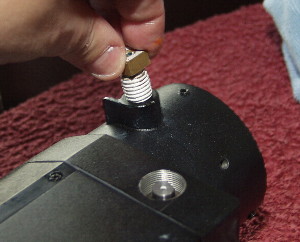
Lubricate the small roller bearings and replace them
on the worm, then replace the worm in its carrier.
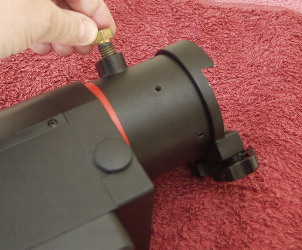
Note: the worm has a longer spindle one end than
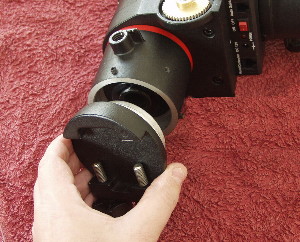
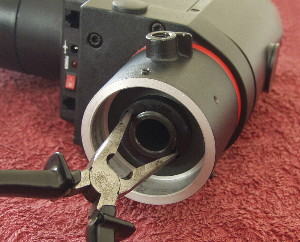
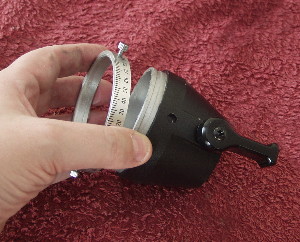
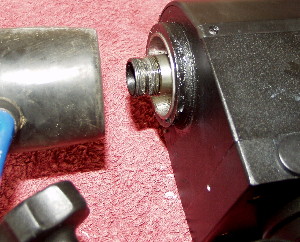
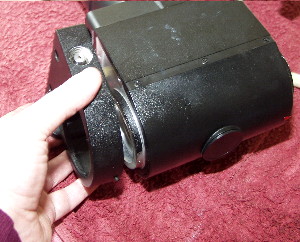
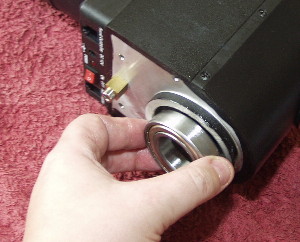
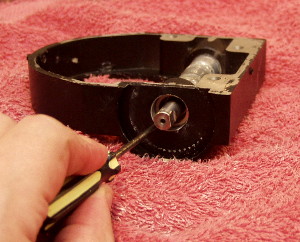
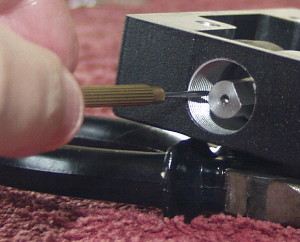
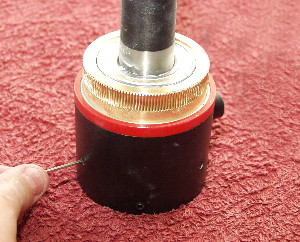
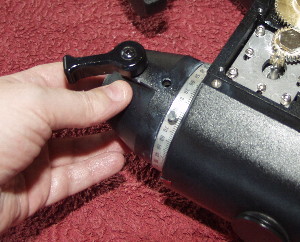
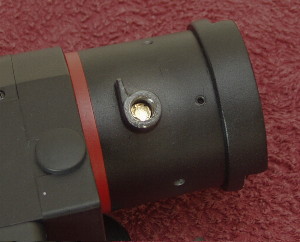
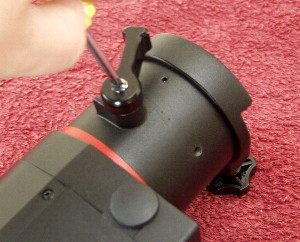
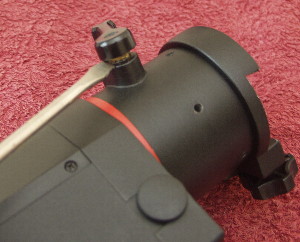
the other.The longer end goes to the motor gear.
Replace the float adjuster and tighten down. The
adjuster should be just tight enough to stop the
worm moving from left to right in the carrier but not
over tightened. If its too loose there will be 'play'
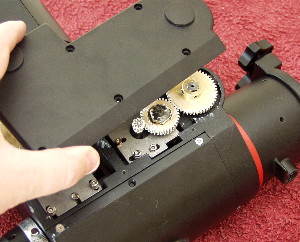
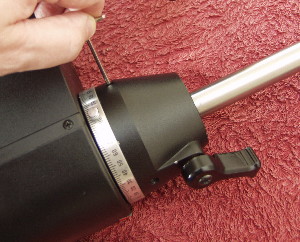
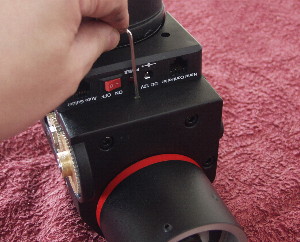
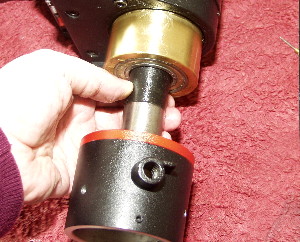
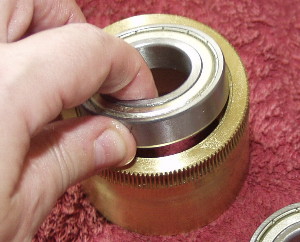
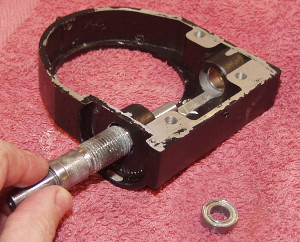
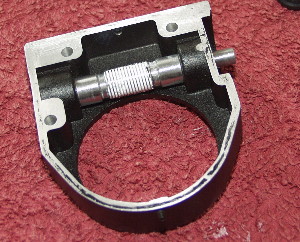
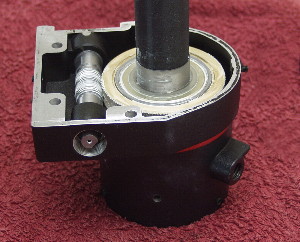
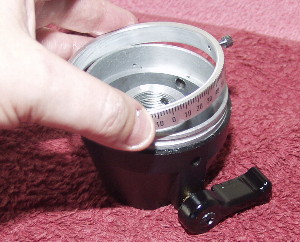
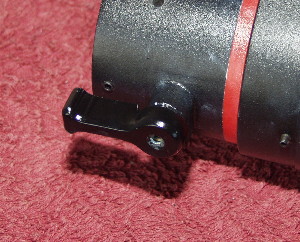
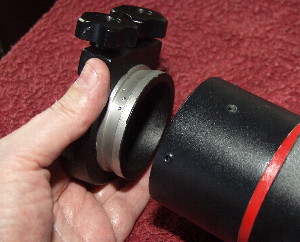
in the mount, if too tight the mount may 'bind'.
Here is the assembled worm carrier. Its been
cleaned and loose flaky paint removed.
You can see the worm now has a thin coat of lithium
grease.
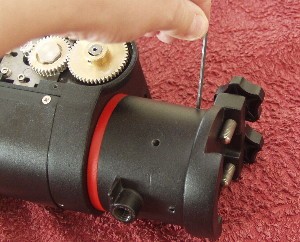
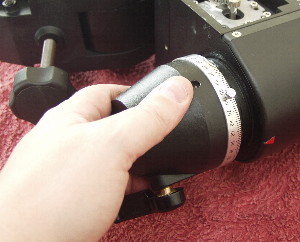
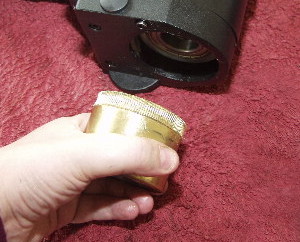
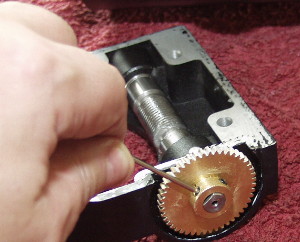
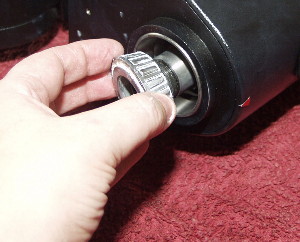
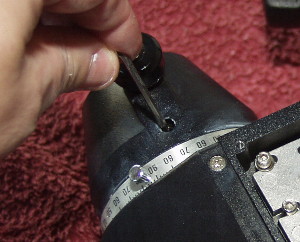
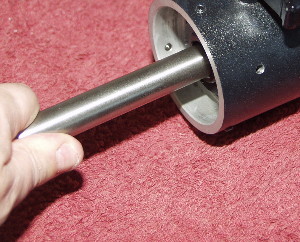
Note: The motor gear can be reattached now or
left until later.The motor gear must have one of its
set screws on the flat portion of the worm spindle.
回复 支持 反对

使用道具 举报

 楼主| steveyzh 发表于 2011-4-7 22:19 | 显示全部楼层 来自: 福建省泉州市 电信
Stage 5 - Re-assembling the Declination Axis

                               
登录/注册后可看大图

                               
登录/注册后可看大图

                               
登录/注册后可看大图
Replace the bearing in the main housing. Apply a
thin layer of lithium grease to its surface.
Reassemble the brass worm gear with its bearings
(you may need to tap these in with a nylon mallet)
and replace the assembly onto the Declination
barrel and shaft. Apply a thing layer of lithium grease
to the gear and all bearing faces.
You can also see in this pic the main housing
bearing has had lithium grease applied to its
bearing face.
Replace the round nut in the Decliantion barrel.
Tighten down using the long nosed pliers or
a pair of small screwdrivers.
回复 支持 反对

使用道具 举报

 楼主| steveyzh 发表于 2011-4-7 22:19 | 显示全部楼层 来自: 福建省泉州市 电信

                               
登录/注册后可看大图

                               
登录/注册后可看大图

                               
登录/注册后可看大图
Tighten down the 3 deep set screws on the
Declination barrel.
Replace the worm carrier onto the Declination shaft.
Replace the clear washer on top of the brass
gear. Its almost insivisible in the picture above.
Slide the declination shaft back into the main
housing.
回复 支持 反对

使用道具 举报

 楼主| steveyzh 发表于 2011-4-7 22:20 | 显示全部楼层 来自: 福建省泉州市 电信
回复 11# wenzp


    赫赫,刚有人在问,就发了一帖~
回复 支持 反对

使用道具 举报

 楼主| steveyzh 发表于 2011-4-7 22:21 | 显示全部楼层 来自: 福建省泉州市 电信

                               
登录/注册后可看大图

                               
登录/注册后可看大图

                               
登录/注册后可看大图
Replace the tapered bearing at the bottom of the
main housing after lubricating it with lithium grease.
Note If this wont push all the way in dont worry. As
long as there is some thread showing on the Dec

shaft for the counterweight collar.
Replace the Declination scale on the counterweight
collar.
Replace the counterweight collar. Tighten this down
using only hand pressure. Tighten it as far as it will
go and then back off until the counter-weight lock
lever is in line with the Declination lock
lever.
Note: The threads on this part of the mount can be
very stiff - I applied a small squirt of WD40 to ease
the threads a little.
回复 支持 反对

使用道具 举报

 楼主| steveyzh 发表于 2011-4-7 22:21 | 显示全部楼层 来自: 福建省泉州市 电信

                               
登录/注册后可看大图

                               
登录/注册后可看大图

                               
登录/注册后可看大图
Tighten the 3 set screws in the counterweight
collar.
Replace the cap head bolts (normally silver
coloured) with just enough pressure to hold the
worm carrier in place. Make sure the carrier is lined
up with the mount.
Note: The worm engamement will need to be
adjusted this is covered in the guide HERE.
Replace the Declination lock 'brass button'.
回复 支持 反对

使用道具 举报

 楼主| steveyzh 发表于 2011-4-7 22:22 | 显示全部楼层 来自: 福建省泉州市 电信

                               
登录/注册后可看大图

                               
登录/注册后可看大图

                               
登录/注册后可看大图
Replace the Declination lock bolt. Apply a coat of
lithium grease and hand tighten down.
Replace the Declination lock lever and make sure it
is free to move to both lock and release the
declination axis.
Replace the silver Phillips screw in the Declination
lock lever.
回复 支持 反对

使用道具 举报

 楼主| steveyzh 发表于 2011-4-7 22:22 | 显示全部楼层 来自: 福建省泉州市 电信

                               
登录/注册后可看大图

                               
登录/注册后可看大图

                               
登录/注册后可看大图
Replace the counterweight bar into the Declination
axis.
Replace the dovetail mounting. Make sure the
locking screws for the telescope dovetail bar are
oppositethe Declination lock lever.
Tighten down the dovetail holders 3 set screws.
回复 支持 反对

使用道具 举报

 楼主| steveyzh 发表于 2011-4-7 22:23 | 显示全部楼层 来自: 福建省泉州市 电信

                               
登录/注册后可看大图

                               
登录/注册后可看大图
Replace the plastic motor cover. Replace the 6 Phillips screws in the motor cover.
回复 支持 反对

使用道具 举报

本版积分规则

快速回复 返回顶部 返回列表